In December 2023, a friend of mine @scoot_digital who co-runs @Buzz_WRLD shared with me an Instagram post presenting a very creative 3D cover animation for a Sonic the Hedgehog game. It’s been years since I’ve done anything with VFX or animation, but we thought it’d be fun to have a go at making something similar for another game called Jet Set Radio.
This project is not affiliated with Sega nor Smilebit; The video was created by fans of the game for a non-commercial purpose.
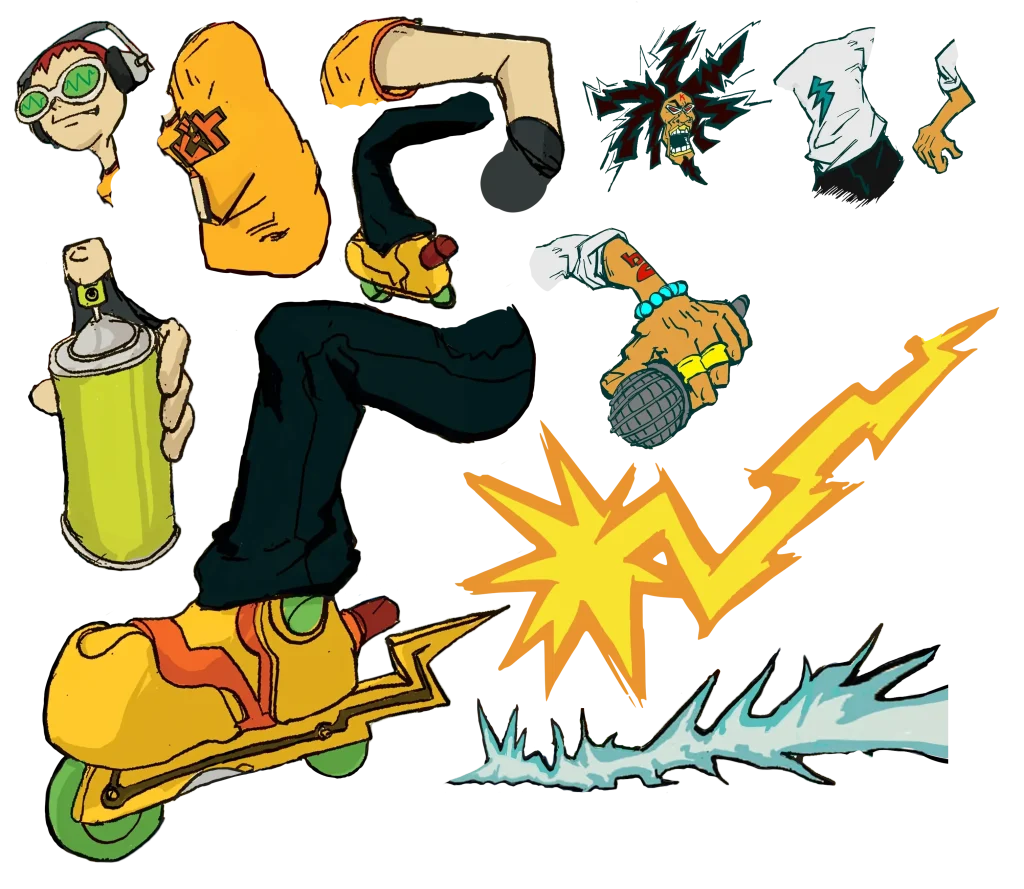
To start, I needed to reconstruct the cover art. I had an inkling that the cover was originally made from reused assets, so I checked the Jet Set Radio fan wiki, and luckily I was right. I’m very grateful to the fans who post and maintain the wiki cause without the original artwork this video couldn’t have be made.

I separated each character into parts so I could animate them later, and filled in bits of torsos and legs that were hidden by limbs and the spray can.
In After Effects, I imported and lined up each asset in a composite shot using the original cover as a base.
I used the puppet tool to mark joints and keyframed movements for character animation. The spray can paint animation went through a few different iterations as seen in the video below.
The animated sparks flying out from the wheels was also iterated on. I extended the line of sparks in the cover to form a horizontal loop that could infinitely scroll, and drew an alternate frame to place in front to hide where the sparks appear from.

The logo animation is recreated from the game’s title screen. A bitmap of the flat 2D logo was traced in Inkscape to create a vectorised version. The 3D extrusion present in the title screen was manually drawn in Inkscape. The separate letters and backdrops were animated in After Effects and recreated frame-by-frame from the title screen reference video.
With the cover animation complete, the final step was to attach it to footage of turning around a Dreamcast game case… which neither of us had.
We took a drive around the city looking in retro game stores for Dreamcast games but every one we found was inside a locked glass cabinet. Up to this point, we hadn’t spent any money on this project. I’m passionate about no-budget filmmaking and didn’t want to spend any money making this video. I feel that when you start putting money into a project, the expectation of the outcome’s quality and polish is different to what you expect from something done just for fun.
The cheapest Dreamcast games we could find were at minimum $70. We considered asking if we could buy just the case and leave the game. Empty-handed and about to leave, I suggested we ask the store attendant if we could inspect the game under the guise of running an errand for a friend who was thinking about purchasing it. Fortuitously, they obliged, and we took a quick video of the case in our hands before returning it to the clerk and leaving.

Mission accomplished.
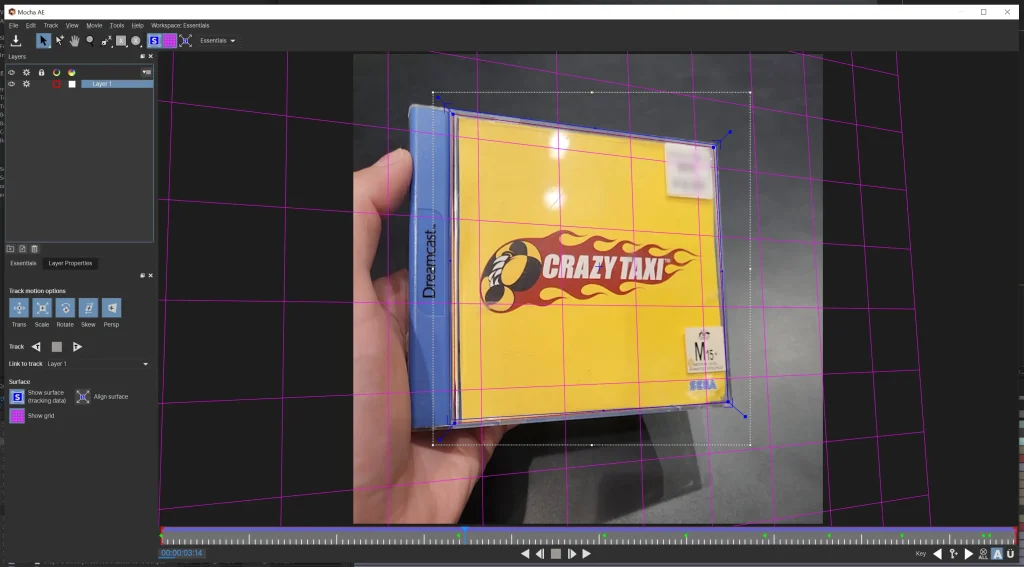
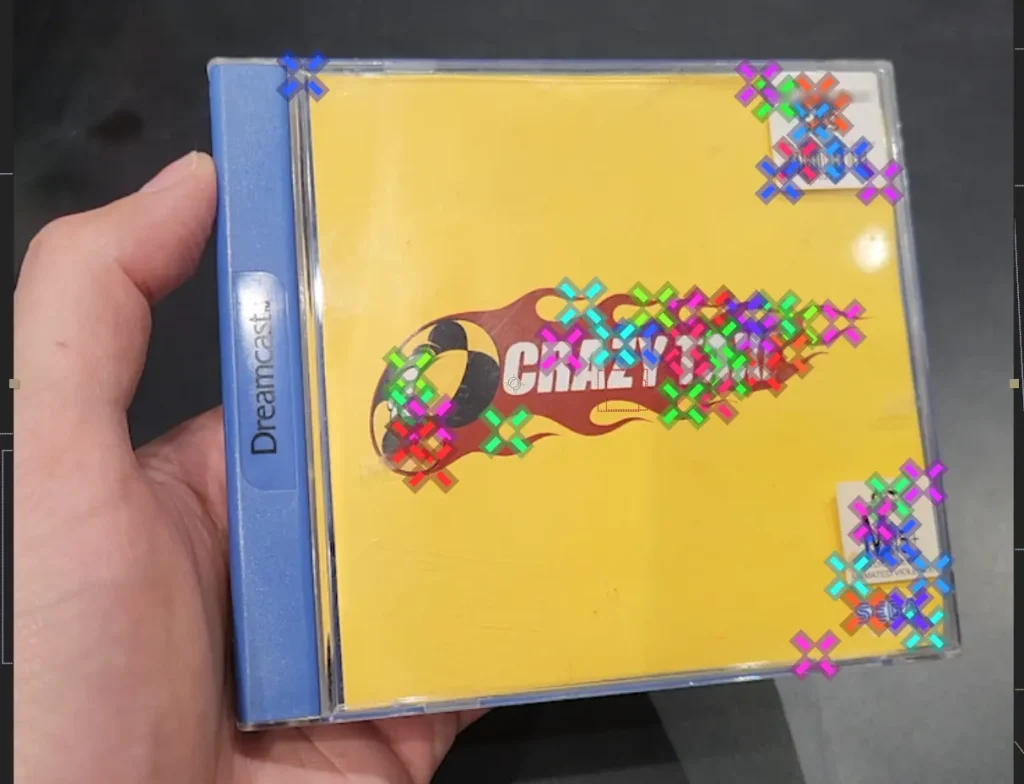
I used Mocha to track the actual cover inside the case and After Effects to track the camera; I placed the assets from the reconstructed cover into the 3D space, moved them around on the Z-axis so they each have varying depth, and eventually…
Project complete!
In all honesty, I’ve never actually played this game, nor had I seen any gameplay from it until after I rendered the final video.
That looks crazy, good job!
Awesome stuff! Keep it up!